Easy Steps to Make Reels on Instagram 2022
According to research, Instagram reels create 67% more engagement than regular Instagram videos. Moreover, 9 out of 10 users of Instagram watch reels every week. Sounds intriguing, right?

Ever since Instagram introduced Instagram reels, it has exploded the internet, and people are, indeed, loving this feature.
According to research, Instagram reels create 67% more engagement than regular Instagram videos. Moreover, 9 out of 10 users of Instagram watch reels every week. Sounds intriguing, right?
What are Instagram Reels, Anyway?
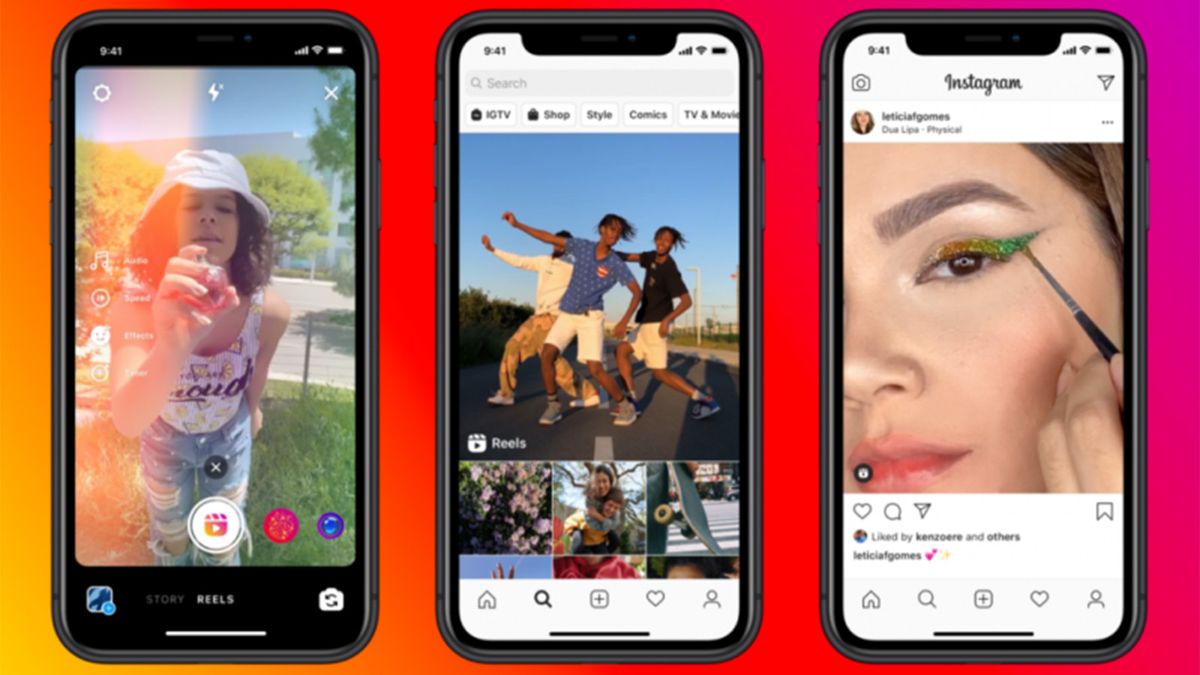
Reels are a fun and exciting way to create short videos (ranging from 15 to 90 seconds) and share them with your friends, family, or anyone on Instagram.
You might have noticed a lot more reels on your Instagram feed. The reason is that Instagram has started focusing more on videos as they are engaging and appealing. Instagram reels are a great way to reach more audiences through the Explore page. Through the Instagram reels on Explore, anyone can reach a wider audience, become a creator, or increase brand awareness.
Don’t get confused between Instagram reels and stories. Instagram stories disappear after 24 hours, while reels don’t disappear unless you delete them. The good news is that, as said earlier, Instagram has started focusing on videos, hence, reels are more favored by the Instagram algorithm which means your reels could reach more people even if they don’t follow you.
Easy Steps to Make Instagram Reels
Here is how you can create Instagram reels in a few simple steps.
1- Set the Whole Plan
If you want to make successful Instagram reels that engage your audience, make sure you plan everything beforehand.
Determine Your Target Audience
Set your target audience and make your content according to them so that they watch, engage and relate with your content.
Set Your Target
You should be clear about what you want to accomplish with your reels. Do you want to increase your brand awareness? Or you want to reach more audience as creator? Or you want to increase your engagement? Be sure of what you want.
Decide the Type of Content
As much as reels are meant for entertainment purposes, it is not compulsory for them to have those viral music videos and dance trends. You can make educational, instructional and even funny content you find entertaining.
Research, Research, Research
Know your competitors and analyze their content. Realize the gaps in their content and plan on filling those gaps.
2- Put Together Your Footage
Grab your phone and channelize your inner content creator to get the best results.
Simply open the Instagram app on your phone and open your profile.
Tap on the upper right corner of the screen at “+”sign.
Now you can gather footage from your reel either through filming or by using existing footage.
Film the Footage
You can start recording your content by holding the white record button at the bottom. You can use the double arrow action, and it will flip the camera and start recording.
A pink border will appear around the record button once you start filming to show you how much is recorded.
To make your content more engaging, use the tools at the side of the screen.
Music: Add sounds or music to your reel.
Select the length: Set the time limit of your reel to 15, 30, 60, or 90 seconds.
Adjust the Speed: You can film your videos in slow motion or fast motion with this tool.
Self-timer: This tool can be very helpful when you are filming yourself without any aid, as it starts a countdown before the recording begins.
Align: With this feature of Instagram reels, you can see the transparent version of the clip you just filmed to help it align with the clip you’ll be filming next. This is great, especially for the transformation, styling, and procedural videos.
AR effects: You can add effects and filters to your videos, like the trendy ones and the ones you’ve saved.
Create a Reel With Existing Footage
With this feature, you can break down already existing content into short, attractive content. You can, for example, take a video you’ve already uploaded on YouTube and then break it into shorter parts for a reel. You can even use pictures for your reels.
To select an existing image from your phone, click the square image and then select the “+” icon located at the bottom left corner.
If the exising videos that you are using are more horizontal, you can upload them and then click the “Scale” icon. Adjust your video as if you’re posting an Instagram story. You can use your index finger and your thumb to adjust the footage to fit vertically.
After you’re done, just tap the three dots that you see in the top right corner and then hit ‘save.’
3- Edit Your Reel
Now that you’ve shot the whole content, it’s time to give that content its final touch.
Edit the Length and Order of Your Footage
Simply tap ”edit clips,” located at the left corner on the bottom of your screen, and all your clips will be lined and ready for you to edit.
To shorten the clips: Select a clip and draw the right and the left ends of the progress bar to make your clip shorter.
To move a clip: Select the clip you want to move and hold that clip. You can drag the clip now when it enlarges and keep it where you want.
To delete a clip: Simply tap the clip you wish to delete and then click the appear button from the bottom of your screen. You can also hold the clip you want to delete and then just tap on the minus sign.
Add Music
Add music to oomph up your videos and make them more engaging. In fact, adding music can be a great way to let people discover your profile.
To do this, just click on the Music notes icon that you see on the screen while editing. An audio editing screen will appear. You can now easily adjust the audio of your footage and the music you added from here.
You can add three kinds of audio here, namely music, voiceover, and sound effects.
Bonus Tip: Use the trending sounds of reels to reach a wider audience.
Include Closed Captions
So many people were excited when they got to use the closed captions feature on Instagram reels. It can be great as people will be interested to watch your videos even when they cannot turn their volume up.
To add the closed captions, click the square smiley icon that you see at the top of the screen from where you add stickers or GIFs; select “CC Captions” here, and you’re done!
You can customize your captions and even edit the captions to make sure that they are correct, as there are minor faults in the auto-generated captions sometimes.
Add Text
Add more value to your reels by adding text. The procedure is the same that yu follow to add text to your stories. Tap the “Aa icon and then add your text. Customize the font, style, and color of your text.
After that, place the text where you want it to be and then select the timing you want your text to follow.
Add Filters or Effects
Add more drama and aesthetic value by including filters and text in your reels. You can use the filters you’ve saved or the ones in trend to help you get discovered.
4- Prep and Publish Your Reel
Once you’re done with editing, here are some final steps to prepare and then share your reel with your audience.
Excited yet?
Edit your cover: Tap “Edit your cover” and select a relevant movement or image from your reel as a cover. The cover should be catchy and appealing to make sure that more people click the reel.
Write a caption: Play with your words. Write a caption that is relevant to your reel and connects with your audience.
Choose if you want this on your feed: Now select if you want your reel to be uploaded to your feed. If you want to increase your reach, then definitely upload the reel to your feed.
From here, you can publish your reel, save it as a draft and even schedule a post. Choose whatever time suits you best, and voila! You’re done!
Key Takeaways!
You cannot ignore the popularity of Instagram reels and how they can help you with your business and content to reach heights of recognition. However, it is important to upload content that is of high quality and is good enough for audience to keep watching and liking you.


